Setting locations for your personal or business assets allows you to
access weather information for those locations quickly and easily. You
are able to set and maintain up to six locations. Your created locations
are used in the Local Conditions page, the Radar/Layered Map page, alerts
and the location monitoring features of PrecipTimer
|
|
One of the locations you have created can be set as your default. Your default location will be used on the Local Conditions page and your daily forecast email.
|
User Tip: Observed and forecast data will be provided by the surface
observation site closest to your location. However, PrecipTimer
|
Click the Settings Menu button.

Click the Locations Menu option.
You will be re-directed to the Locations page.
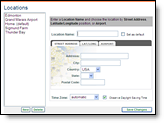
Click the New button.

Select the Airport tab and type
an Airport code in the Airport ID or name field.

Click the Look up button.

The airport information is provided and the airport code is automatically
added to the Location Name field. Set as default, if desired.

Select automatic or the time zone of your choice from the Time Zone drop down menu.
Other options are the Street Address and Lat/Long tabs. If using one of these tabs, complete the requested fields. You may enter your lat/long in Decimal Degrees, Degree/Minute/Second or GPS format.
Click Save Changes.
Observed and forecast data will be provided by the surface observation
site closest to your location. However, PrecipTimer
Use this method to quickly add a general location. If you need to set a more accurate location use the steps above, Create an Exact Location.
In the Radar/Layered Map display select the Locations
icon.

Choose Add a Location from the submenu.

Place your cursor over the location on the map and left-click
once.

Name your location and select a time zone in the pop
up.
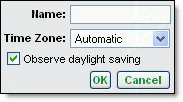
Select whether or not to observe daylight-saving time.
Click OK.
Click the Settings Menu button.
Click the Locations Menu option.
You will be re-directed to the Locations page.
Highlight the location to be modified.
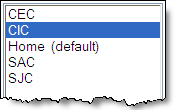
Modify the location information using one of the tabs.

Click the Save Changes button.
![]()